Embrace the enchanting world of calla tubers, and find out why florists and garden enthusiasts alike are singing their praises! Join in as we explore the fun and fulfillment of buying and cultivating these beautiful plants. With their exquisite appearance, easy care, and ability to bring joy into your life, you'll be glad you took the plunge into Calla gardening.
Why Calla Tubers Are Fun to Buy and Cultivate
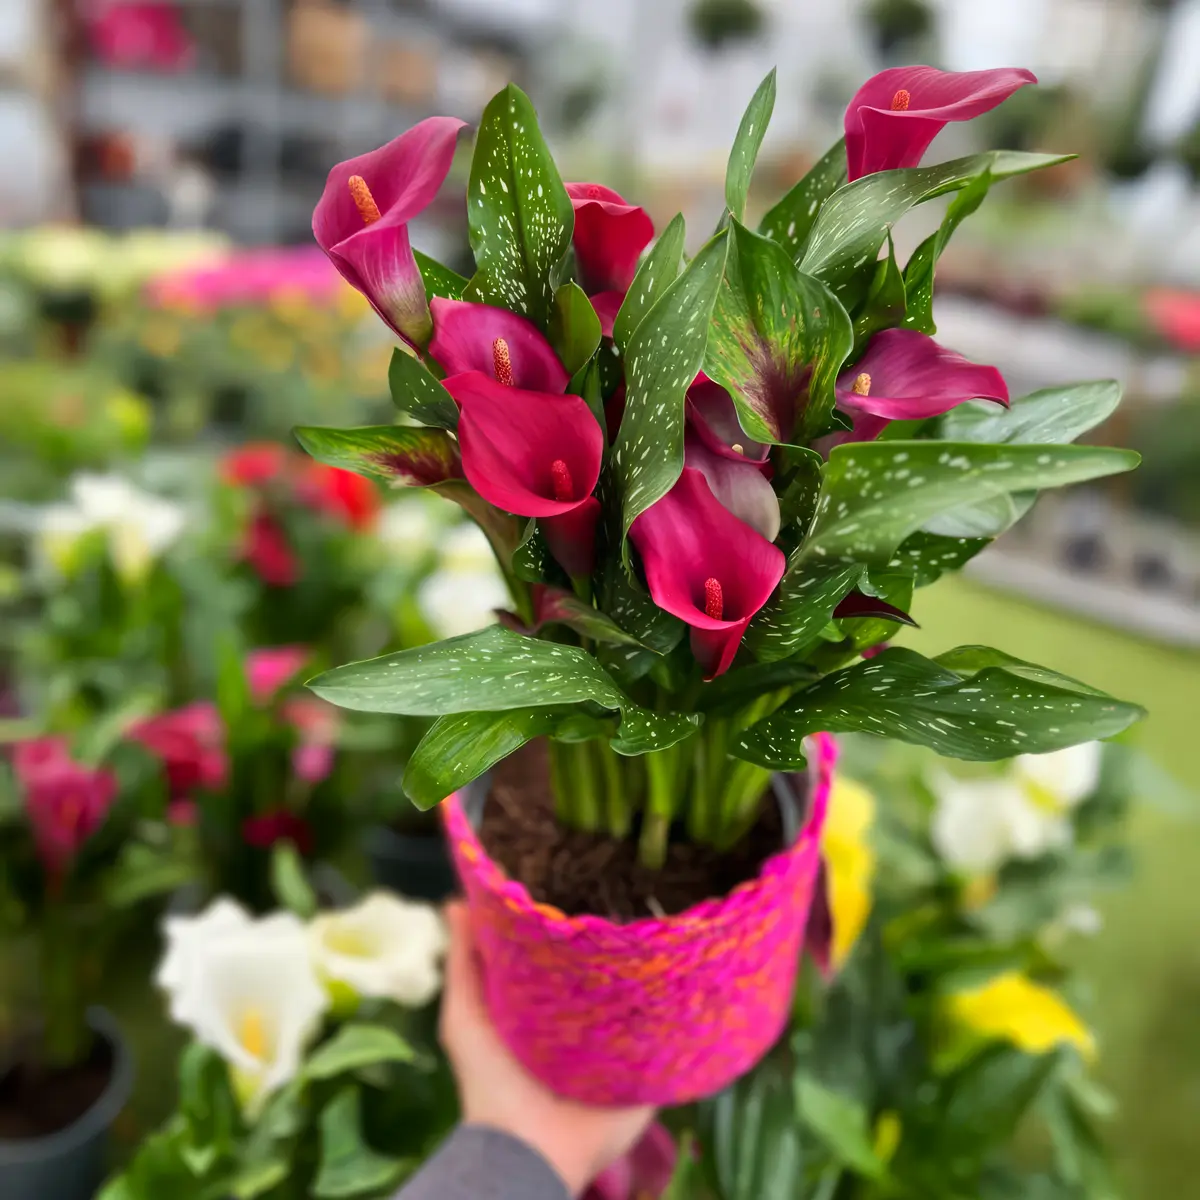
There's something truly special about nurturing a zantedeschia, the botanical alias of the calla, from a tiny tuber into a flourishing, elegant blooming plant. Calla tubers are a cost-effective and enjoyable way to begin your journey, as they provide the opportunity to witness the entire growth cycle of the plant.
With a variety of colors and sizes to choose from, you can find the perfect match for your garden and personal style. Moreover, Calla tubers are relatively low-maintenance, making them an ideal choice for both beginners and experienced gardeners alike.
So, don't hesitate to visit your local florist today and discover the wonders of Calla tubers for yourself!

Enjoying Calla Plants in Your Garden
Once you've planted your Calla tubers, sit back and watch the magic unfold. As the elegant blooms unfurl, your garden will be transformed into an oasis of beauty and tranquility. Calla plants thrive in well-draining soil and require minimal care, meaning you can spend less time tending to them and more time enjoying their captivating presence. Whether you're adding a pop of color to a small patio garden or creating a stunning focal point in a larger landscape, Calla plants are sure to impress. So, why wait? Start your Calla garden today, and enjoy the rewards for the seasons to come!
Why Calla Plants Make You Happy
It's no secret that nature has a profound impact on our well-being, and calla plants are no exception. Their graceful appearance and vibrant colors are known to evoke feelings of joy and happiness, making them a delightful addition to any living space. Calla plants not only brighten up your garden but can also be brought indoors as elegant cut flowers, further enhancing your home's ambiance. As you care for and admire your calla plants, you'll find yourself feeling more connected to nature and experiencing a deep sense of satisfaction. So, go ahead and indulge in the simple pleasures of calla plants – your heart and soul will thank you for it.

How to Grow Callas From Tubers in Your Garden: A Step-by-Step Tutorial
Ready to embark on your calla tuber adventure? Visit your local florist today to pick up a selection of these delightful tubers and start cultivating your very own garden paradise. Whether you're a seasoned gardener or a complete novice, you'll be amazed at the joy and satisfaction that calla plants bring. Don't wait any longer – move on to the below how-to section, follow the nine steps to glory, and let the beauty of calla plants transform your garden and your life!
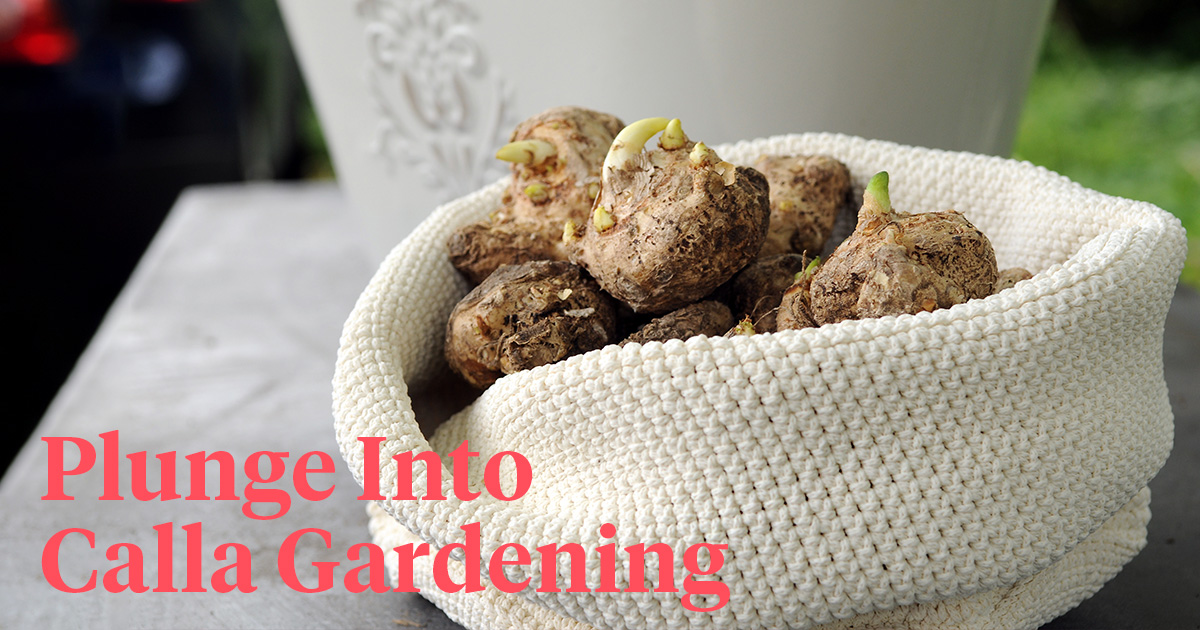
Step 1: Buy Calla Tubers
Visit a local florist, garden center, or flower market to purchase healthy, high-quality calla tubers. You'll find a variety of colors and sizes available, so choose the ones that best suit your garden and personal preferences.

Photo by @mizutouch_backpacker
Step 2: Choose the Right Location
Select a well-draining location in your garden that receives at least six hours of sunlight per day. Callas prefer slightly acidic to neutral soil with a pH between 6.0 and 6.5. If needed, amend your soil with peat moss, compost, or other organic materials to improve its fertility and drainage. Use hydro granules for baskets, pots, and bowls.

Photo by Wouter Koppen for iBulb.
Step 3: Prepare the Soil
Loosen the soil to a depth of about 30 cm (12 inches) using a garden fork or tiller. This will help the tubers establish a strong root system and promote healthy growth. Mix in a slow-release, balanced fertilizer, following the package instructions for the correct application rate.

Photo by Wouter Koppen for iBulb.
Step 4: Plant the Tubers
Plant the calla tubers in spring, once the threat of frost has passed and soil temperatures have reached at least 60°F (15°C). Dig a hole about 3-4 inches deep and place the tuber with the growing point facing upward. Space the tubers approximately 12-18 inches apart, depending on the mature size of the variety you have chosen.

Photo by Wouter Koppen for iBulb.
Step 5: Water and Mulch
Cover the tubers with soil, and water the planting area thoroughly. Apply a 5-8 cm layer of organic mulch, such as bark chips or compost, around the base of the plants. This will help retain moisture, suppress weeds, and regulate soil temperature.
Step 6: Care for Your Callas
Water your callas regularly, keeping the soil consistently moist but not waterlogged. During the growing season, apply a balanced liquid fertilizer every 4-6 weeks to support healthy growth and vibrant blooms.
Step 7: Monitor for Pests and Diseases
Keep an eye out for common pests, such as aphids and spider mites, and treat them promptly with insecticidal soap or other appropriate measures. Watch for signs of diseases, such as root rot or bacterial soft rot, and address any issues by improving soil drainage or applying the necessary fungicides.

Step 8: Enjoy the Blooms
Calla plants typically bloom within 8-12 weeks after planting the tubers. The elegant, trumpet-shaped flowers will last for several weeks and can be cut for indoor arrangements or left in the garden to provide a stunning display.
Step 9: Prepare for Winter (optional)
In colder climates (hardiness zones 7 and below), you may need to dig up the tubers and store them indoors for the winter. After the foliage has died back, carefully lift the tubers from the ground, clean off any excess soil, and let them dry for a few days. Store the tubers in a cool, dark place, such as a garage or basement, in a container filled with slightly damp peat moss or vermiculite.

Your Own Calla Heaven
By following these simple steps, you'll be well on your way to growing your own beautiful calla heaven that will bring joy and elegance to your outdoor space. Happy gardening!
Learn more about tubers in the Simply Tubers section of the Simply Calla website.