Long study sessions drain mental energy fast. Eyes blur from textbook pages. Brains stop absorbing information effectively. Taking breaks becomes essential, but most students default to screens that don't actually refresh the mind.
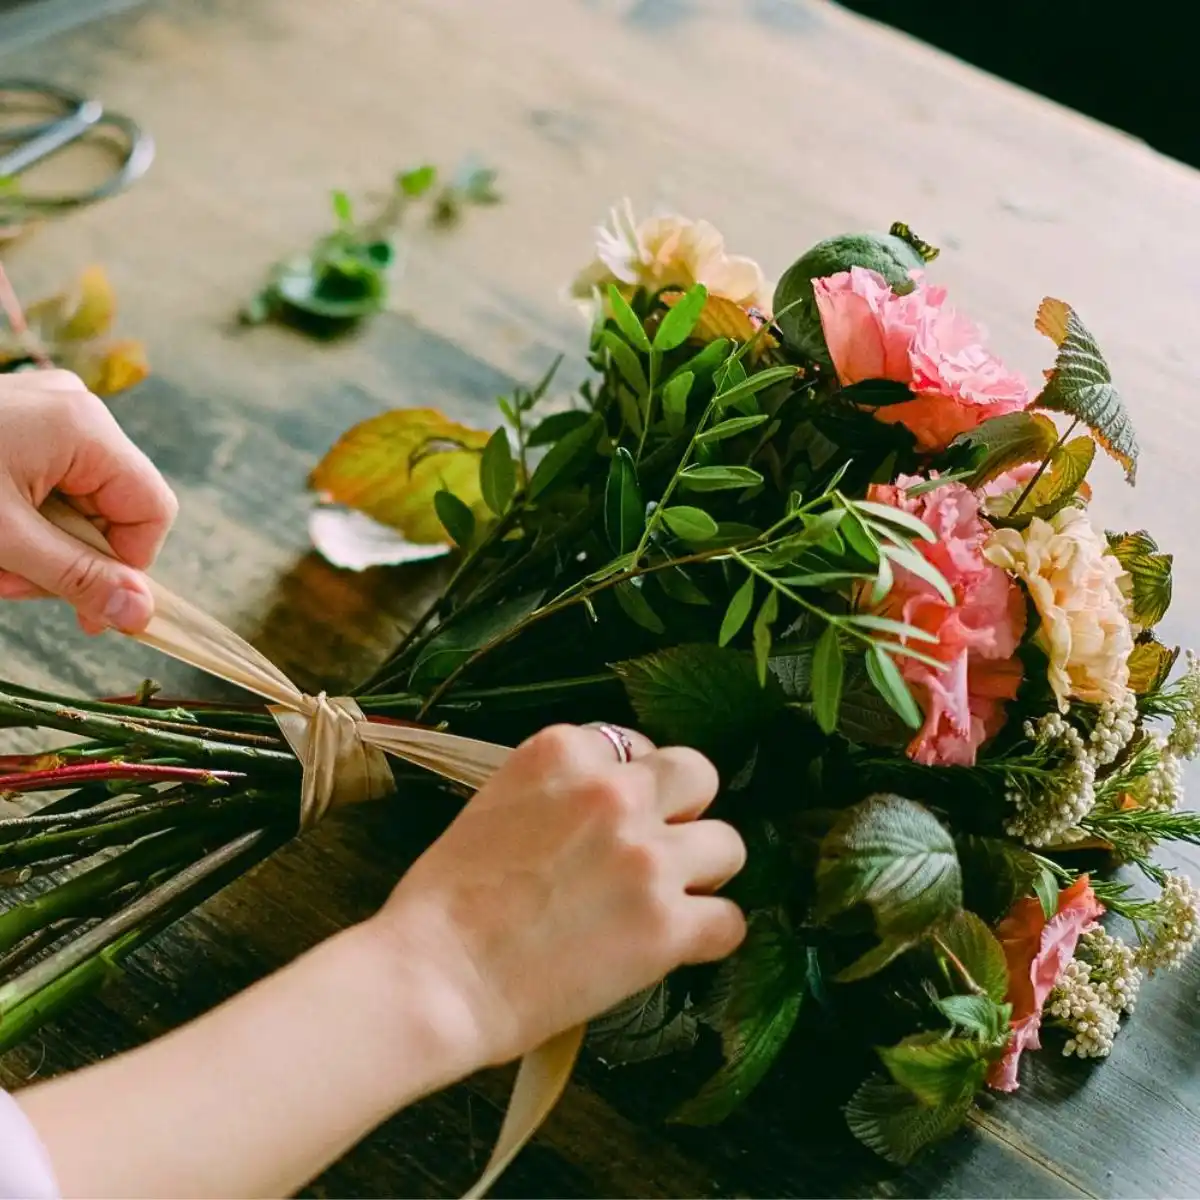
Flower crafts offer a genuine mental reset. Working with petals, stems, and natural materials engages your hands while resting your academic brain. The tactile experience grounds you. The visual results provide immediate satisfaction. Plus, you create tangible items instead of losing hours to scrolling.
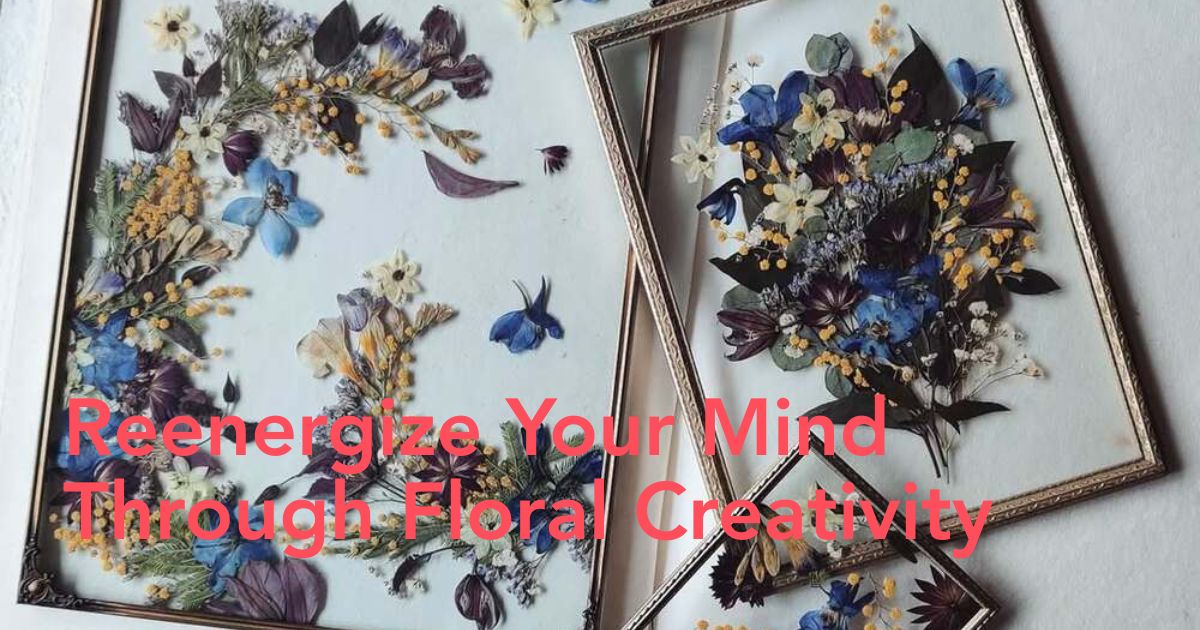
You can find more knowledge here: Anastasia Kovaleva Creates Exquisite Floral Collages From Pressed Flowers

Understanding Flower Preservation Methods
Two main techniques preserve flowers for crafting: pressing and drying. Each method produces different results and suits different project types. Mastering both expands your creative options significantly.
Pressing flattens flowers between weighted surfaces. This technique works best for delicate blooms with thin petals. The process removes moisture while maintaining color and general shape. Pressed specimens become two-dimensional but retain remarkable detail.
Drying preserves the three-dimensional flower structure. Flowers hang upside down or sit in desiccants until moisture evaporates completely. This method keeps the natural form intact. Colors often deepen or shift during the drying process.

Managing Time for Creative Activities
Balancing hobbies with responsibilities challenges everyone. Demanding schedules create constant pressure. Finding time for personal interests seems impossible when deadlines dominate your calendar.
Creative breaks actually enhance productivity rather than reduce it. Brief diversions refresh focus when returning to demanding tasks. The key lies in choosing activities that genuinely restore energy. Some students seek essay writers for hire when workloads become overwhelming. EduBirdie provides expert assistance in writing during stressful periods. This professional support creates space for flower crafting that maintains mental health. Guidance with tasks allows time for restorative hobbies without sacrificing important deadlines.
Setting aside 30-minute blocks for flower projects creates sustainable routines. These creative intervals prevent burnout while keeping you productive overall.

Pressing Flowers: Complete Step-by-Step Guide
Pressed flower crafts start with proper pressing technique. The process requires patience but demands minimal effort. Getting this foundation right ensures beautiful results for all subsequent projects.
Selecting Flowers for Pressing
Choose flowers at peak bloom for best results. Morning collection works ideally after the dew evaporates. Avoid wet or damaged specimens. Flowers with naturally flat faces press most successfully.
Excellent pressing choices:
- Pansies maintain vivid colors perfectly
- Cosmos preserves delicate petal structure
- Daisies press reliably every time
- Ferns add interesting texture and shape
- Four-leaf clovers bring luck to projects
Poor pressing candidates:
- Roses contain too much moisture
- Tulips shrivel and brown badly
- Thick succulents rot instead of pressing
- Multi-layered flowers lose definition
- Very delicate blooms disintegrate easily

The Book Pressing Method
Heavy books provide the classic pressing tool. Literature textbooks work perfectly since you're using them anyway. Place flowers between parchment paper sheets. The paper prevents moisture from staining book pages.
Arrange flowers carefully before closing the book. Overlap creates brown spots where petals touch. Space specimens at least one inch apart. Flatten any folded petals gently before pressing begins.
Stack additional books on top for consistent pressure. Three to four heavy volumes create ideal weight. Place this stack somewhere undisturbed. Closet floors or under beds work well in small spaces.
Check progress after one week by carefully lifting the top parchment. Avoid touching flowers directly at this stage. Most blooms need 10-14 days for complete drying. Thicker specimens require three weeks.
Alternative Pressing Techniques
Microwave pressing speeds the process dramatically. Place flowers between parchment inside a heavy book. Microwave in 30-second intervals with 30-second cooling periods between. This method finishes in minutes rather than weeks.
Commercial flower presses offer more control than books. These wooden frames with tightening screws apply even pressure across multiple layers. Craft stores sell basic presses for $15-25. The investment pays off if you press flowers regularly.
Iron pressing provides another quick option. Set the iron to low heat with no steam. Place flowers between parchment sheets. Press gently for 10-15 seconds. Allow cooling, then repeat. This technique finishes in under five minutes.

Pressed Flower Art Ideas and Projects
What to do with pressed flowers once they're ready? Dozens of projects showcase these delicate specimens beautifully. Start simple and progress to complex designs as your confidence grows.
Laminated Bookmarks
Pressed flower bookmarks take 10 minutes to complete. Cut cardstock into strips measuring 2 by 6 inches. Arrange pressed blooms in pleasing patterns. Cover with clear contact paper or run through a laminator.
Punch holes at the top and add ribbon for finishing touches. These bookmarks make excellent gifts. Different flower combinations suit different recipients. Create several during one sitting to keep on hand.
Framed Botanical Collections
Frame pressed flowers for wall art that rivals expensive prints. White or cream matting showcases specimens best. Arrange flowers in symmetrical patterns or natural clusters. Sign and date your work in pencil on the mat.
Thrift stores sell frames cheaply for these projects. Replace existing art with your pressed flower compositions. Matching frames in different sizes create gallery wall effects. Update seasonally as you collect new specimens.
Greeting Card Designs
Handmade pressed flower cards beat store-bought options easily. Blank cardstock provides the base. Arrange pressed flowers on the front in attractive compositions. Secure with tiny glue dots applied carefully.
Leave the insides blank for writing messages. These cards work for birthdays, thank yous, or any occasion. Recipients consistently treasure handmade cards more than printed versions. The time investment communicates genuine thoughtfulness.

Suncatcher Projects
Pressed flowers between glass or contact paper create stunning window decorations. The sunlight illuminates petals from behind, highlighting colors and details. Embroidery hoops make perfect frames for these suncatchers.
Stretch contact paper across the hoop sticky side up. Arrange pressed flowers on the surface. Cover with another contact paper layer. Trim excess and hang in sunny windows. The natural light transforms simple flowers into glowing art.
Resin Jewelry and Keychains
Resin preserves pressed flowers in clear, durable pieces. Mix two-part resin according to package directions. Pour into silicone molds, position tiny pressed flowers, and allow full curing. Sand and polish finished pieces until perfectly smooth.
Small flowers work best for jewelry projects. Forget-me-nots, individual rose petals, and baby's breath fit standard mold sizes. These pieces become conversation starters wherever you wear them. Friends constantly request custom versions after seeing your creations.

Drying Flowers: Techniques and Methods
Dried flower crafts preserve three-dimensional form, unlike flat pressed versions. Multiple drying methods exist, each with specific advantages. Choosing the right technique depends on flower type and intended use.
Air Drying Flowers
Air drying requires zero special equipment. Gather flowers in small bunches of 5-7 stems. Secure with rubber bands that tighten as stems shrink during drying. Hang upside down in dark, dry locations.
Darkness preserves colors better than light exposure. Closets, pantries, or unused corners work perfectly. Good air circulation prevents mold growth. Most flowers dry completely within two weeks.
Remove dried flowers gently after curing. Stems become brittle and snap easily. Handle the flower heads when possible. Store in boxes or hang as permanent decorations.
Silica Gel Drying Method
Silica gel produces superior color retention compared to air drying. This desiccant absorbs moisture rapidly while maintaining flower shape. Craft stores sell flower-specific silica gel in bright blue crystals.
Bury flowers completely in silica gel inside airtight containers. The crystals should surround every petal without crushing them. Seal containers tightly to concentrate the drying effect. Check progress after 3-5 days.
Flowers feel papery when fully dried. Brush away silica crystals gently with soft paintbrushes. The gel can be reused indefinitely by reactivating in a low oven. This method costs more upfront but produces premium results.
Glycerin Preservation
Glycerin creates flexible dried flowers that maintain movement. Mix one part glycerin with two parts water. Cut fresh flower stems at angles and place them in the solution. Flowers absorb glycerin over 2-3 weeks, replacing water in cells.
This method works brilliantly for foliage and hardy flowers. Eucalyptus, roses, and hydrangeas respond particularly well. The preserved materials last for years without becoming brittle. Colors shift to muted, vintage tones during the process.

Dried Flower Projects and Craft Ideas
Dried flower projects offer endless creative possibilities. The three-dimensional nature of dried blooms enables different designs than pressed flowers allow. These crafts bring natural beauty into living spaces permanently.
Wreath Making Basics
Dried flower wreaths welcome guests year-round. Start with wire wreath frames from craft stores. Attach dried flowers using floral wire or hot glue. Layer different textures for visual interest.
Work in sections around the wreath form. Vary flower sizes and colors throughout. Add dried grasses or seed pods for contrast. Hang on doors or walls for instant impact.
Seasonal wreaths use appropriate materials. Spring versions feature pastel dried flowers. Fall wreaths incorporate wheat, leaves, and warm tones. Winter designs use evergreens and dried berries.
Shadow Box Displays
Shadow boxes showcase dried flowers in protected environments. The deep frames accommodate three-dimensional arrangements. Pin or glue dried specimens to backing boards. The glass front protects delicate dried materials from dust and damage.
Theme your shadow boxes by color, season, or flower type. Label specimens with handwritten tags for scientific appeal. These displays work beautifully in any room. They bring nature indoors without requiring maintenance.

Candle Embedding
Dried flowers embedded in candle wax create stunning decorative pieces. Use pillar candles or make your own from scratch. Dip dried flowers in melted wax briefly. Press onto candle exteriors while wax remains tacky.
The flowers become permanently sealed in the wax layer. Never burn these decorative candles since dried materials are flammable. They serve purely aesthetic purposes. Group multiple flower-embedded candles for dramatic centerpieces.
Terrarium Additions
Dried flowers add color to living terrariums without competing for resources. Small dried blooms tucked among succulents and moss create whimsical scenes. The preserved flowers contrast beautifully with living plants.
Replace dried flowers seasonally to refresh the terrarium's appearance. This gives purpose to smaller pressed flower projects and dried specimens. The combination of living and preserved botanicals creates unique displays.

Things to Make With Flowers Throughout the Seasons
Different seasons provide distinct materials for flower crafts. Spring delivers fresh blooms perfect for pressing. Summer offers abundant flowers for both methods. Fall gives dramatic foliage and late-season flowers. Winter provides evergreens, berries, and dried elements.
Collecting materials throughout the year builds substantial crafting supplies. Store pressed flowers in labeled envelopes organized by type and color. Keep dried flowers in boxes with tissue paper between layers. This preparation means materials stay ready whenever inspiration strikes.
Seasonal flower DIYs connect creative practice to natural cycles. This awareness adds depth to crafting beyond the projects themselves. Watching plants change throughout the year enriches the entire experience.
Advanced Flower Craft Techniques
Once basic methods feel comfortable, more complex flower arts and crafts become accessible. These advanced projects require more time and materials but produce professional-quality results.
Flower Pressing Ideas for Lampshades
Pressed flowers on lampshades create magical lighting effects. Use plain paper or fabric lampshades as bases. Attach pressed flowers with decoupage medium or fabric glue. Seal with additional medium for protection.
When lit, the lamp illuminates flowers from behind. This highlights translucent petals and creates glowing effects. The projects transform basic lamps into custom art pieces. Different flower arrangements suit different room aesthetics.
Wax Tablet Sachets
Dried flowers embedded in scented wax tablets freshen drawers and closets naturally. Melt soy wax in a double boiler. Add essential oils for fragrance. Pour thin layers into molds, position pressed flowers, and cover with more wax.
Remove from molds when fully hardened. These sachets last months while releasing subtle scent. Tuck into clothing storage, linen closets, or luggage. They combine practical purpose with beautiful presentation.

Building a Sustainable Practice
Flower craft hobbies remain accessible on any budget. Collect materials from yards, parks, and roadsides where permitted. Always ask permission before taking flowers from private property. Many locations offer abundant specimens that cost nothing.
Thrift stores provide affordable supplies like frames, vases, and containers. Dollar stores stock basic craft materials cheaply. Investing in quality tools like good scissors and tweezers improves results. But starting requires almost no money.
Storage systems keep supplies organized and accessible. File pressed flowers in old greeting card boxes. Hang dried flowers from closet rods. Label everything clearly by type, color, and collection date. This organization makes creating spontaneous projects simple.
Document your flower projects through photos. This builds a portfolio of work that shows skill development. Share images on social media to connect with other crafters. The community aspect adds another rewarding dimension to the hobby.

The Creative Benefits
Flower crafts provide tangible results from your efforts. Even crafting a bouquet, according to research, has many benefits. Unlike many activities, you finish with physical objects you created yourself. These items beautify living spaces, make thoughtful gifts, and remind you of specific collecting moments.
The hobby develops artistic skills gradually. Color sense improves through choosing flower combinations. Spatial awareness grows from arranging compositions. Patience increases through pressing and drying processes. These abilities transfer to other creative pursuits.
Working with natural materials connects you to seasonal rhythms and plant life cycles. This awareness grounds you in the physical world. The time spent with flowers provides mindful breaks from digital overload. Your hands stay busy while your mind genuinely rests.
Start your first flower craft project this week. Collect a few blooms during your next outdoor time. Press them in a heavy book you already own. Two weeks later, you'll have materials ready for bookmarks, cards, or simple framed art. The creative practice will enrich your life in ways you can't yet imagine.